Rental Cleaning Preparation Tips: Your Ultimate Rental Property Cleaning Checklist
When it comes to managing a rental property, cleanliness is king. Whether you’re prepping for new tenants or wrapping up after someone moves out, a spotless space speaks volumes. I’ve learned that having a solid plan makes all the difference. That’s why I’m sharing my go-to rental cleaning preparation tips to help you get your property sparkling and ready to impress.
Cleaning a rental property isn’t just about wiping down surfaces. It’s about creating a welcoming environment that feels like home from the moment someone steps inside. So, let’s dive into the details and make sure you don’t miss a thing.
Why Rental Cleaning Preparation Tips Matter
You might wonder why I emphasize preparation so much. Well, cleaning a rental property can be overwhelming if you jump in without a plan. You risk missing spots, wasting time, or even damaging surfaces by using the wrong products. Preparation helps you:
Organize your cleaning supplies and tools efficiently
Prioritize tasks to save time and energy
Ensure every corner shines, from the kitchen to the bathroom
Protect your investment by maintaining the property’s condition
Think of it like setting the stage for a great performance. When everything is in place, the cleaning flows smoothly, and the results are stunning.
Step-by-Step Rental Cleaning Preparation Tips
Here’s how I approach cleaning a rental property, step by step. You can follow along or customize it to fit your needs.
1. Gather Your Cleaning Supplies
Before you start, make sure you have everything you need. Here’s a quick checklist:
All-purpose cleaner
Glass cleaner
Disinfectant wipes or spray
Floor cleaner (appropriate for hardwood, tile, or carpet)
Sponges, scrub brushes, microfiber cloths
Vacuum cleaner and mop
Trash bags
Rubber gloves
Bucket and spray bottles
Having these ready means you won’t have to stop mid-cleaning to hunt for something.
2. Declutter and Remove Trash
Start by walking through the property and removing any leftover trash or personal items. This step clears the way for a thorough clean and helps you spot any damage or repairs needed.
3. Dust and Wipe Surfaces
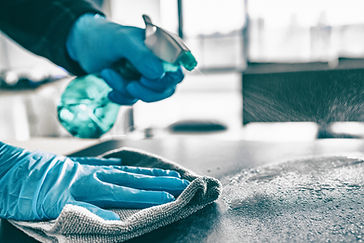
Dust settles everywhere, even in places you might not expect. Use a microfiber cloth to dust ceiling fans, light fixtures, baseboards, window sills, and vents. Then, wipe down all surfaces with an appropriate cleaner.
4. Clean the Kitchen Thoroughly
The kitchen is often the heart of the home, so it deserves special attention:
Clean inside and outside of cabinets and drawers
Wipe down countertops and backsplashes
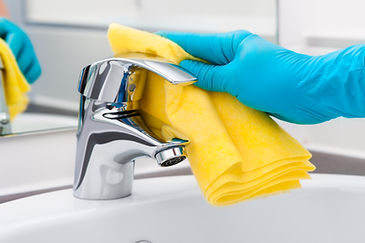
Scrub the sink and faucet
Clean appliances inside and out (oven, microwave, refrigerator)
Sweep and mop the floor
5. Tackle the Bathrooms
Bathrooms can be tricky, but a deep clean here makes a huge difference:
Scrub the toilet, sink, shower, and tub
Clean mirrors and glass surfaces
Wipe down cabinets and fixtures
Sweep and mop floors with disinfectant
6. Floors and Carpets
Vacuum carpets thoroughly, paying attention to corners and under furniture. For hardwood or tile floors, sweep and mop with the right cleaner to avoid damage.
7. Final Touches
Don’t forget these finishing touches:
Replace burnt-out light bulbs
Check smoke detectors and replace batteries if needed
Air out the property by opening windows
Add a fresh scent with natural air fresheners or essential oils

How to Use a Rental Property Cleaning Checklist Effectively
Having a rental property cleaning checklist is like having a trusted friend guiding you through the process. Here’s how I make the most of mine:
Print it out or keep it on your phone so you can check off tasks as you go.
Break the cleaning into zones (kitchen, bathroom, living areas) to stay focused.
Set a timer for each task to keep yourself on track.
Note any repairs or maintenance issues you spot during cleaning.
Review the checklist after finishing to ensure nothing was missed.
This approach keeps me organized and confident that the property is truly ready for the next tenant.
Tips for Maintaining Cleanliness Between Tenants
Cleaning between tenants can feel like a race against time. Here are some tips I use to keep things manageable:
Schedule regular inspections to catch issues early
Encourage tenants to report maintenance problems promptly
Provide basic cleaning supplies for tenants to use
Address minor repairs immediately to prevent bigger problems
Keep a cleaning kit handy for quick touch-ups
These small steps help maintain the property’s condition and reduce the workload when it’s time for a full clean.

Why Professional Cleaning Services Can Be a Game-Changer
Sometimes, no matter how prepared you are, cleaning a rental property can be a big job. That’s when I recommend considering professional cleaning services. They bring:
Expertise in deep cleaning and stain removal
Specialized equipment for carpets and hard floors
Time-saving efficiency so you can focus on other tasks
Peace of mind knowing the property is spotless and tenant-ready
If you want to impress your tenants and protect your investment, professional help can be a smart choice.
Making Your Rental Property Shine Every Time
At the end of the day, a clean rental property is more than just a tidy space. It’s a reflection of care, respect, and professionalism. By following these rental cleaning preparation tips and using a detailed checklist, you can ensure your property always looks its best.
Remember, consistency is key. A little effort before and after each tenancy goes a long way toward keeping your property in top shape. And when your rental sparkles, so does your reputation.
Ready to get started? Grab your supplies, print your checklist, and let’s make your rental property shine like never before!


Comments